How do I integrate Vendo in NATS?
Follow these steps to set up VSERVICES in NATS
Add biller
Add Biller Vendo Services. Set Merchant ID and Shared Secret
Go to Billers Admin > Setup new Biller (Vendo Services) > Click Add > Type your Merchant ID and your Shared Secret
You can get your Merchant ID and your Shared Secret from Vendo's backoffice here https://backoffice.vend-o.com/merchant-merchants/index
Configure VServices
- Click on Configuration

- In the "Current Section" dropdown select Billers and click "Change Section"

- Locate the SET_EXPIRE_VSERVICES_DATE setting and use the dropdown to select "Biller Set" then scroll all the way down and click on "Store Changes"

Configure Site IDs
Synchronize NATS and VendoYou can automatically synchronize your NATS Sites and Join Options configuration with Vendo, see our documentation here https://docs.vendoservices.com/docs/nats-sites-and-join-options-auto-sync-with-vendo
If you synchronised NATS and Vendo already then you can skip to the Cascade configuration section.
If you prefer to manually configure your sites and join options then keep reading.
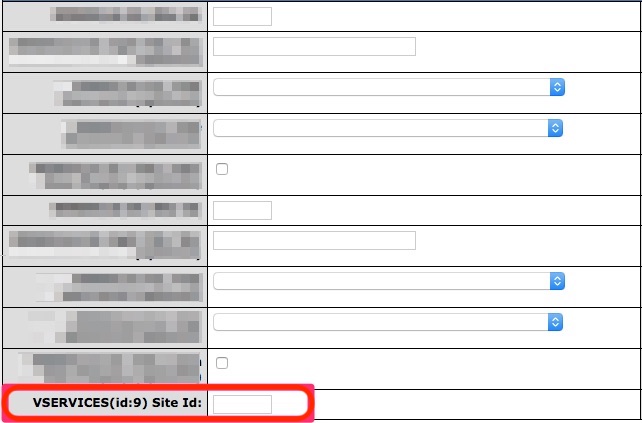
- Click to Sites Admin

- Edit your sites' tours, click on "Edit"

- Look for VSERVICES(id:x) Site Id: and enter your Vendo Site ID
You can get your Vendo Site IDs from Vendo's backoffice here https://backoffice.vend-o.com/merchant-sites/index

Configure Join Options
- On the same page (Edit Tour), scroll down to Join Options for this Tour, click on the pencil icon.
You must enter the Vendo Offer ID for every Join Option that you've configured for the tour.
You can get your Vendo Offer IDs from Vendo's Backoffice here https://backoffice.vend-o.com/merchant-offers/index

- In the edit form, look for VSERVICES (id:x ) Offer ID: and enter the Vendo Offer ID.

Configure Cascades
- Go to Billers Admin then click on Add a Cascade, then enter Vendo in "Shortname" click OK


- Scroll down to the bottom of the page and locate the Cascade Steps section. Then click on Add

- Scroll down to the bottom of the page again, in Add Cascade Step select Switch Cascade and click
Add

- Again, scroll down to the bottom of the page then select you other biller and click Save

- Scroll down again, now click on the pencil icon of the cascade that you just created.

- Click on Automatic Cascade (if needed: choose Target Countries and Excluded Countries) then click on
Save Changes

You are done!
If you need further assistance configuring NATS then please contact TMM to get support.
You can also check their online documentation here https://tmmwiki.com/index.php/Main_Page
Updated 3 months ago
